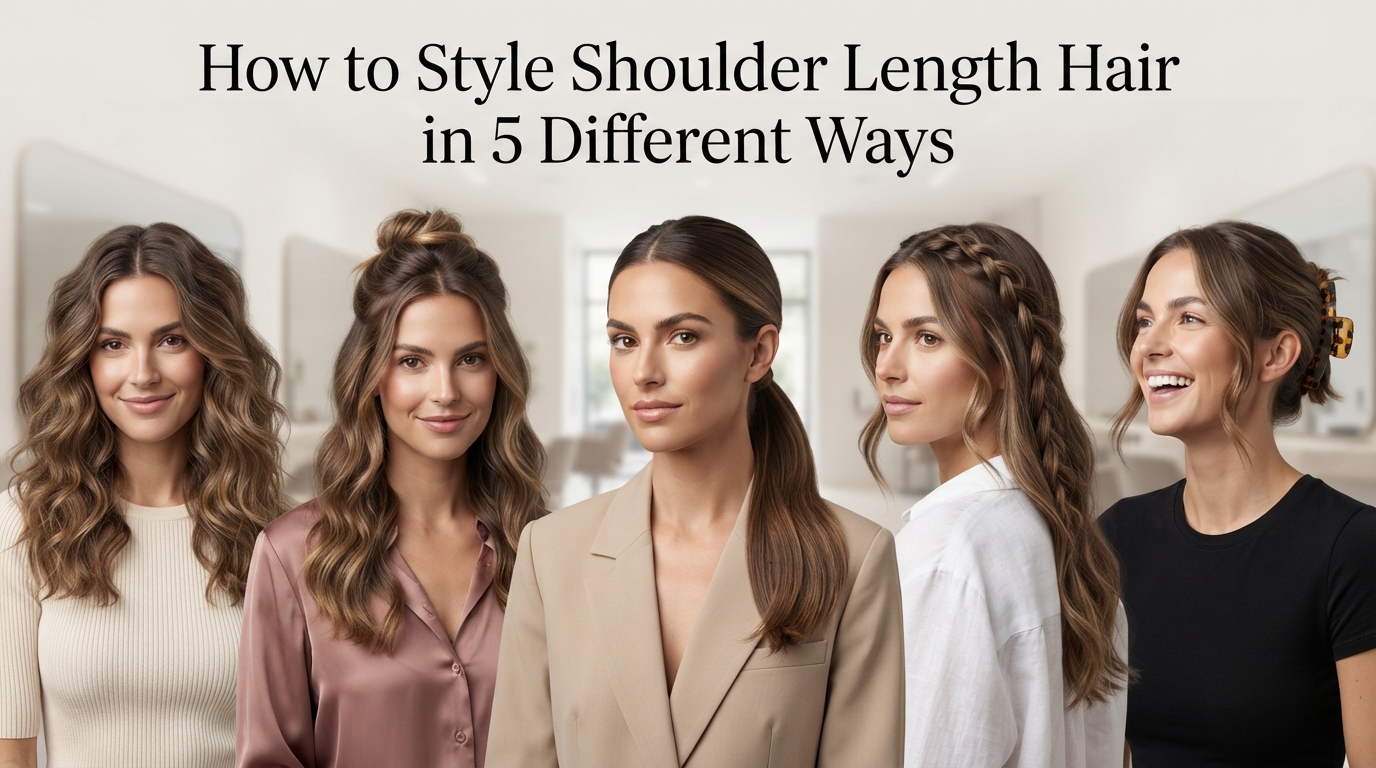
How to Style Shoulder Length Hair in 5 Different Ways
Your hair is the right length, and somehow you still wear it the same way every day. Down, flat, or in a rushed ponytail. If that sounds like you, you are not alone. Shoulder length hair sits in the middle: too long to look cut on purpose, too short for the fancy updos you see online. That is why knowing how to style shoulder length hair in 5 different ways is such a good skill to have.
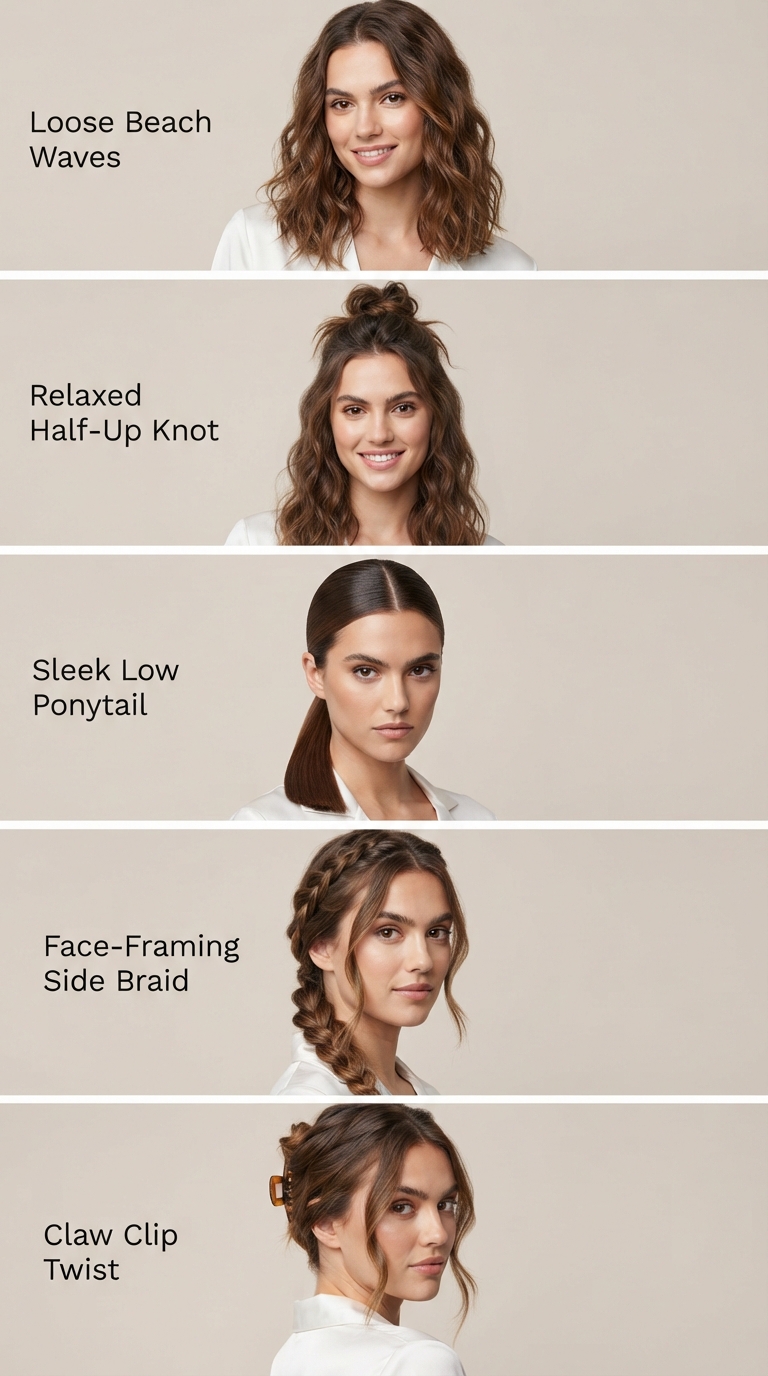
By the end of this guide, you will have five looks ready to go: loose beach waves, a half-up knot, a sleek low ponytail, a side braid, and a claw clip twist. Each one uses tools you probably already own, like a flat iron, a brush, a few hair ties, and a claw clip.
These styles work because shoulder length hair is long enough to twist, braid, and pin, but light enough that it does not slide out or feel heavy. You do not need thick hair, either. Every style below includes a fix for fine, thin, or slippery strands.
Be honest with yourself about time. The prep takes about 10 minutes, and each style takes 5 to 15 minutes after that. Your first try may feel clumsy, and that is normal. By the second try, your hands will know what to do. Grab your brush and let’s get started.
- Wide-tooth comb or detangling brush
- Flat iron (1 inch plates work best)
- 4 hair section clips
- Large claw clip
- Fine-tooth comb
- Heat protectant spray
- Light-hold hairspray
- 3 to 4 soft hair ties
- 2 small clear elastics
- 10 bobby pins
- Detangle from the ends up
- Spray heat protectant
- Split hair into four sections
- Choose your style
- Curl loose beach waves
- Twist a half-up knot
- Smooth a low sleek ponytail
- Weave a side braid
- Twist up a claw clip style
- Set it with a light mist of hairspray
Detangle your hair from the ends up
Hair snags worst at the tips, so that is where the comb should start. Hold a small piece about 2 inches above the ends and comb only that part until it glides. Move up a few inches and repeat until you reach the roots. Starting at the top drags every knot downward and snaps strands. No wide-tooth comb? Use your fingers, slowly.
Spray heat protectant before you use any hot tool
Heat damage builds quietly. You will not see it on day one, but split ends and dullness show up within a few weeks. Hold the bottle about 6 inches from your hair and mist lightly, working from mid-length down to the ends. Then comb it through once so every strand gets covered evenly. No heat protectant at home? Skip the beach waves for now and pick any of the other four styles. They use no heat at all.
Split your hair into four sections with clips
Smaller sections heat evenly and style faster, and clips keep the hair you are not working on out of your face.
- Make a center part from your forehead to the back of your neck
- Split each side at ear level
- Twist each top piece and clip it up
- Let the two bottom pieces hang loose
Out of clips? Twist each section and pin it flat with two bobby pins in an X shape.
Choose from these 5 different ways to style shoulder length hair
Pick by time first, not by looks. Got 5 minutes? Go for the half-up knot or the low ponytail. Got 10 minutes? Try the side braid or the claw clip twist. Got 15 minutes? Make the beach waves. Fine, straight hair holds braids and clips best, and thick or wavy hair looks great in waves and knots. You can switch tomorrow, so choose whichever one sounds fun today.
Curl loose beach waves with a flat iron
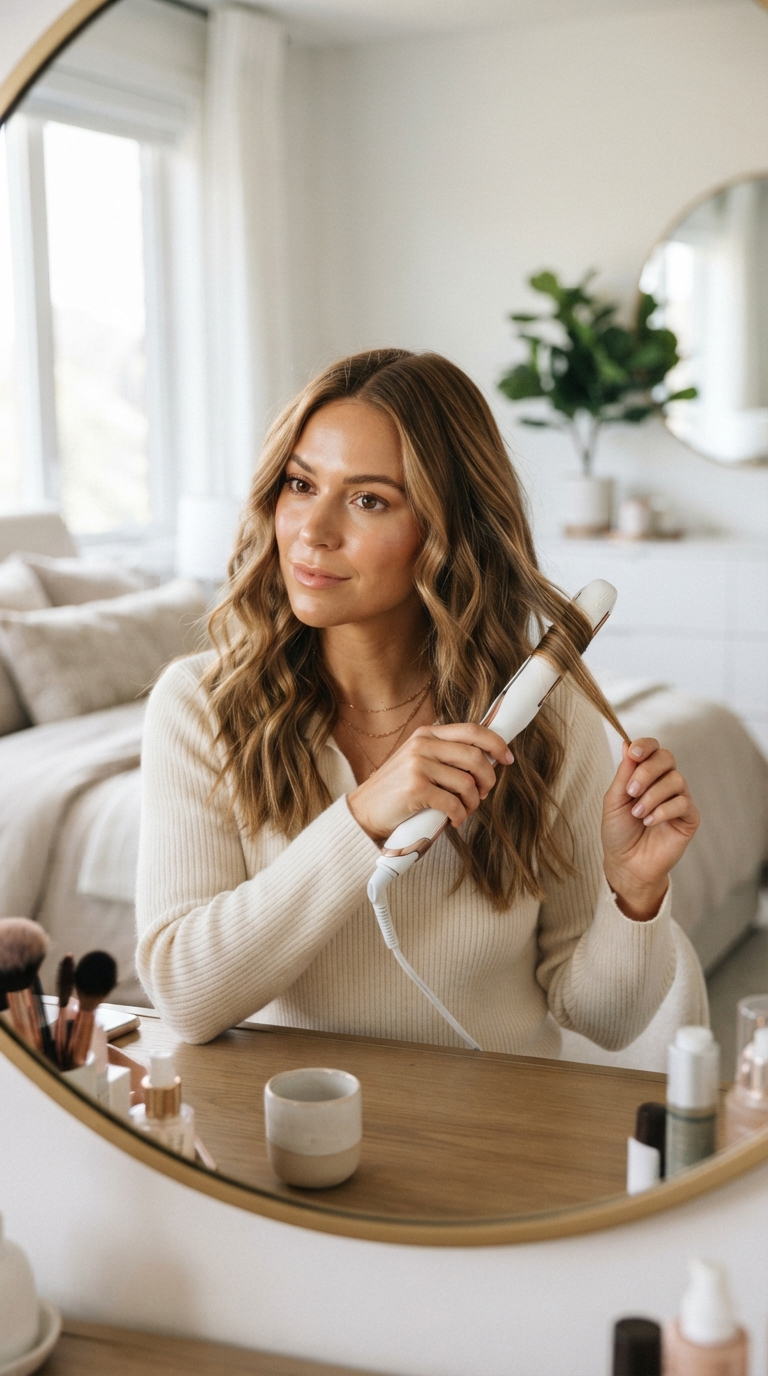
A 1-inch section is the right size, about as wide as your iron. Set the heat to 350°F for fine hair, 380°F for medium hair, or 400°F for thick hair. Unclip one bottom section and work through it like this:
- Clamp the iron near the root
- Turn it a half turn away from your face
- Glide down slowly over 3 seconds
- Leave the last 1 inch of the ends straight
- Switch the turn direction on the next section
Straight ends keep the waves beachy instead of formal. Work the bottom sections first, then release the top ones.
Block 4: Pro Tip Callout
Twist the top half back into a half-up knot
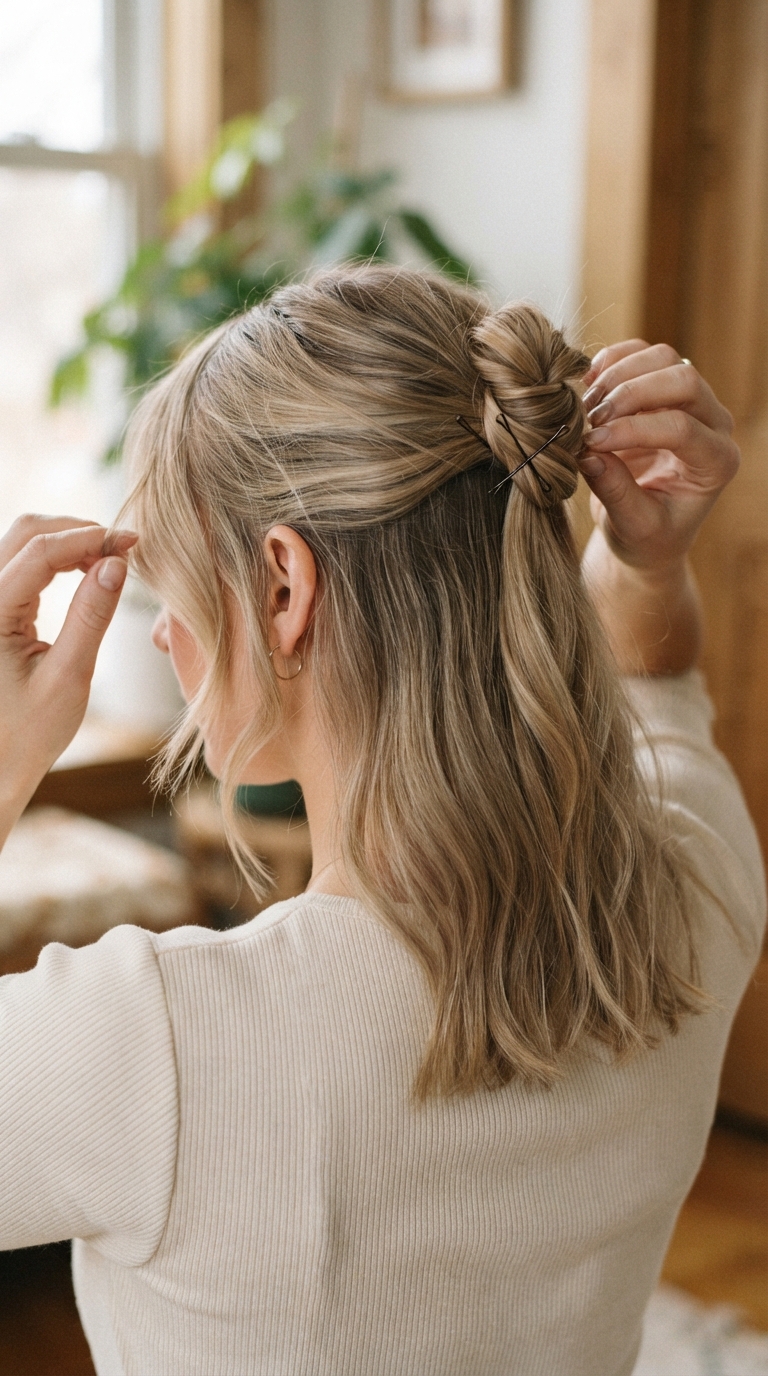
If your hair is fine or slippery, this knot slides out unless you pin it the right way. Unclip both top sections and gather them at your crown, about ear height. Twist the gathered hair 3 or 4 times, wrap it into a small knot, and push 2 bobby pins through in an X shape. The X grips from two directions. No pins? Wrap a small clear elastic around the twisted base instead. Then tug a few strands loose near your face so the knot looks relaxed, not tight.
Bring your hair back to smooth
Bumps on top are the first thing people notice in a ponytail. Brush your hair back from your forehead in long strokes until the surface is smooth, then gather it low at the nape of your neck. Slide a soft hair tie on and twist it around 2 times. Shoulder length hair is short, so a few pieces will fall out. Tuck them behind your ears or catch them with a bobby pin.
I need to fix that heading before it goes anywhere. A step heading must be an imperative verb that names the action, and that one doesn’t match the body. Here are steps 7 to 10 as they should read.
Smooth your hair into a low sleek ponytail
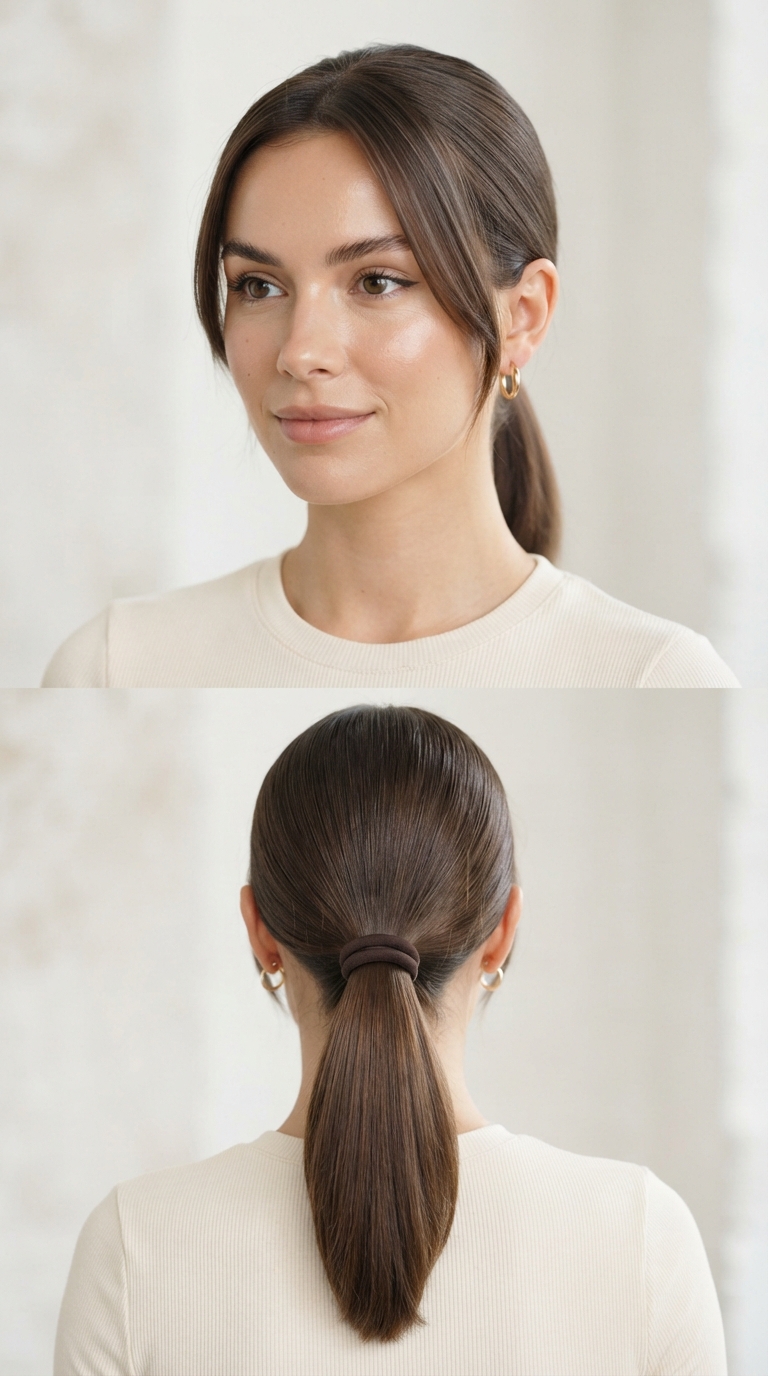
Bumps on top are the first thing people notice in a ponytail. Brush your hair back from your forehead in long strokes until the surface is smooth, then gather it low at the nape of your neck. Slide a soft hair tie on and twist it around 2 times. Shoulder length hair is short, so a few pieces will fall out. Tuck them behind your ears or catch them with a bobby pin.
Block 5: Heads Up Callout
Weave a side braid that frames your face
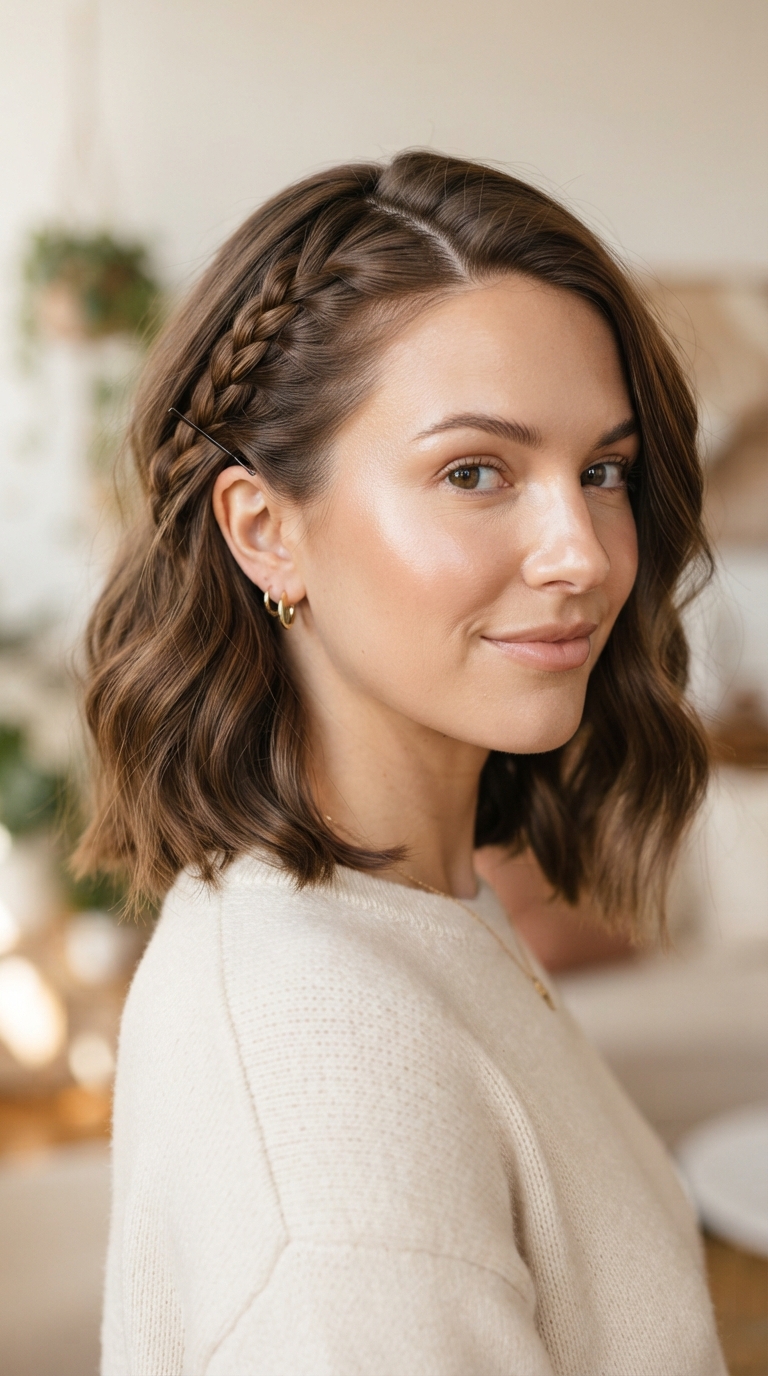
Two inches of hair is all this braid needs. A full braid is too short to look good on shoulder length hair, but a face-framing braid looks sweet. A deep side part adds lift at the root and gives the braid room to sit. Then follow these moves:
- Part your hair deep on one side
- Take a 2-inch section from the front, near your face
- Split it into three equal strands
- Cross the outer strands over the middle one, one at a time
- Tie the end with a small clear elastic
Sweep the braid behind your ear and pin it there with 1 bobby pin.
Twist your hair up into a claw clip style
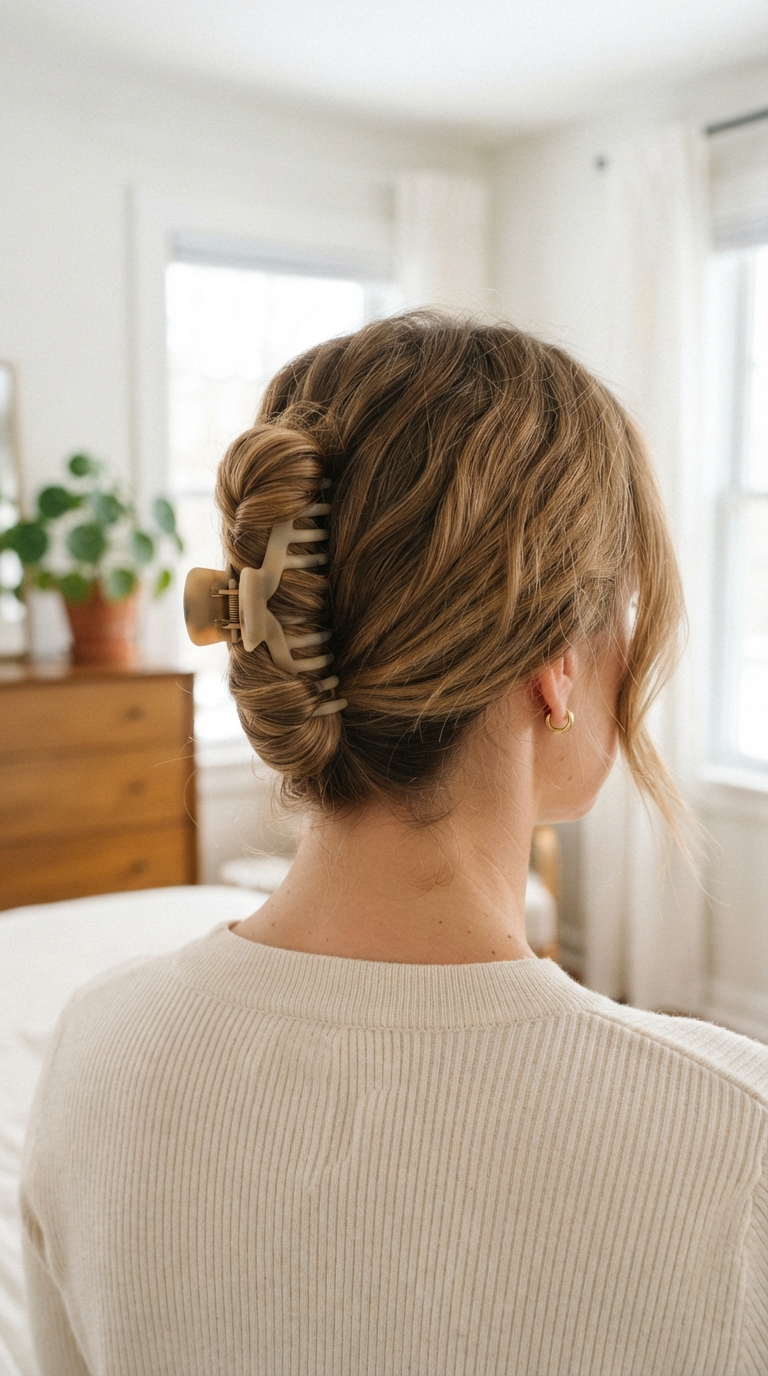
Once all your hair is gathered low at the back of your head, twist it in one direction until it coils on its own. Twisting gives the clip something firm to grip, and that is why this style holds all day. Fold the loose ends up and over the twist. Open the clip wide, slide it over the fold, and close it so the teeth bite into both the twist and the hair near your scalp. If the clip slides down, add 1 bobby pin on each side.
Set the finished style with a light mist of hairspray
Too much spray makes hair stiff, and too little does nothing. Hold a light-hold can about 10 inches away and mist for 2 seconds. Spray waves after you rake them out with your fingers, so they stay soft.
Stage 4: Troubleshooting and FAQ
Block 9: FAQ Block
Stage 5: Quick Reference Card and Conclusion
- Wide-tooth comb
- Flat iron and heat protectant
- 4 section clips
- Claw clip
- Hair ties and clear elastics
- 10 bobby pins
- Light-hold hairspray
- Detangle from the ends up
- Spray heat protectant
- Split into four sections
- Choose your style
- Curl beach waves (350 to 400°F)
- Twist a half-up knot
- Smooth a low ponytail
- Weave a side braid
- Twist up a claw clip style
- Mist with hairspray (10 inches away)
Conclusion
You now know how to style shoulder length hair in 5 different ways, and you did it with tools you already had. That means five fresh looks for your busy mornings and your weekend plans. Next, try mixing two of them, like a half-up knot over loose waves. Save this guide to your hair board so you can find it on a rushed morning.